Before getting started, locate the original documentation for the microphone or at least find the microphone model and brand name so that you can research potential fixes if necessary. Hopefully, by the time you’ve finished our guide, your microphone will work. Also, be sure to read out article on how to enable a microphone in Windows.
Check Physical Connections
The first step is to check whether your microphone has a faulty hardware connection. This is quite simple to do. First, unplug your microphone and then plug it back in. You should notice a sound to signify that Windows has recognized new hardware.
Find Out If It’s Just an App Problem
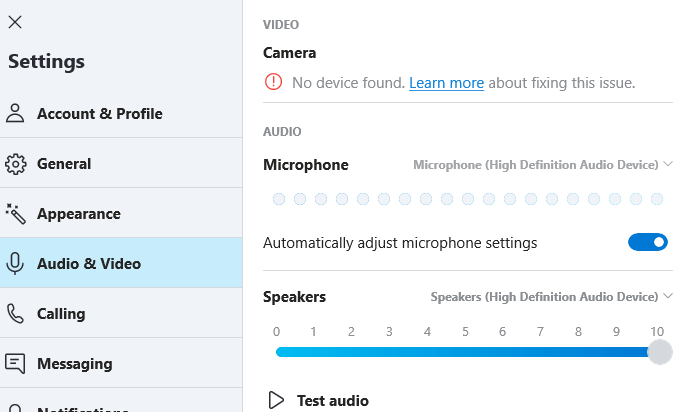
Before you get too into troubleshooting your microphone, figure out whether it’s having problems in a particular app or a system-wide issue. The easiest way to do this is to open Sound settings. Press Windows + I, then go to System > Sound > Microphone. Select Start Test and start talking. If Windows indicates that it hears the input, you probably have a problem with just the app you used. Sometimes, standalone apps have their own controls for choosing which audio devices are used as default. Typically, you can find these options somewhere in the settings menu. The location will differ between each application, and some apps won’t have the setting at all. If you cannot find any sound settings page, a quick Google search for “How to change microphone in x application” will bring back valuable results. Once you’ve made the change, restart the application and test to see if your microphone works.
Make Sure Windows Recognizes Your Microphone
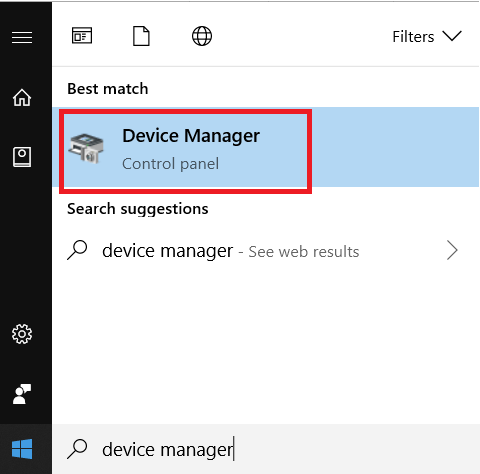
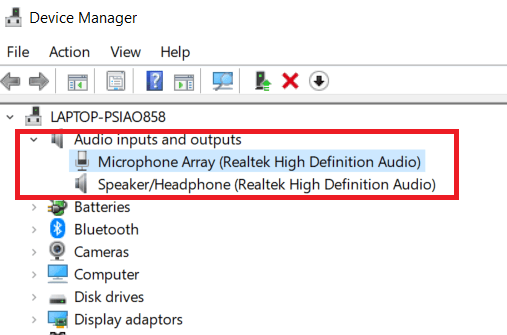
Don’t have any sound prompts? Click Start and search for Device Manager. Click on the first option that appears. In Device Manager, expand the Audio inputs and outputs section. When your microphone is plugged in, it should appear here. If you don’t see your microphone here, unplug it and plug it back in again. If the microphone still doesn’t appear on the list, try these steps:
Connect it to a different USB port. Try a different cable if the one on your microphone is interchangeable. Connect it to another computer to ensure the microphone is functional.
If none of these steps work, chances are good that your microphone has a problem, and you’ll need to replace it. If your microphone does appear in Device Manager, it’s time to check your audio drivers.
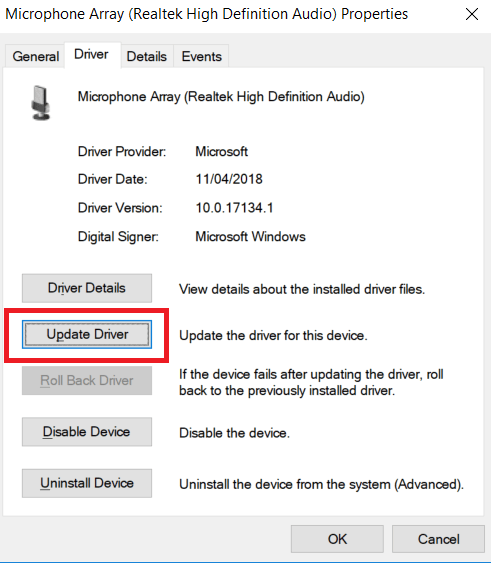
Install or Update Audio Drivers
Most microphones are now plug-and-play, and installing and updating drivers yourself is mostly a thing of the past. In rare cases with Windows 10, you might need to download an official driver. If you see your microphone in Device Manager, right-click it and choose Properties. In the Properties window, switch to the Driver tab and select Update Driver. In the window that opens, select Search automatically for updated driver software. If Windows doesn’t find a driver, search the web for your microphone brand and model number. Head to the manufacturer’s website to see whether any drivers are available. After following these steps, revisit the application you were trying to use the microphone in and test to see if it works. Still no luck? Move on to the next step below.
Check Microphone Options
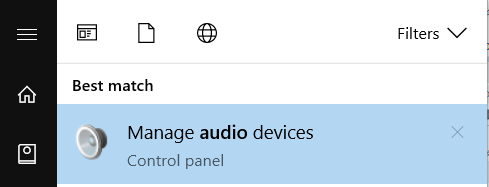
Windows has its own default audio devices that you might need to adjust before you can use your microphone. To adjust your sound preferences on Windows, open the Start menu, type Audio, and then select Manage audio devices.
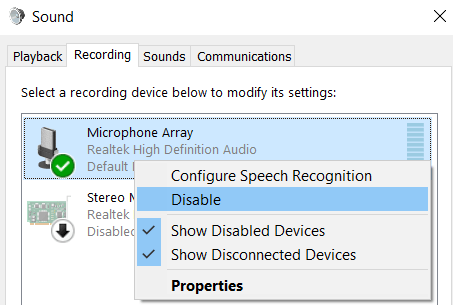
In the Sound window, switch to the Recording tab. Right-click the microphone you want to use and select Enable if you see that option. If you see a Disable option instead, your microphone is already enabled.
If you don’t see your microphone here, try selecting Show Disabled Devices to make sure it hasn’t been hidden from sight. If it shows up on the list, right-click it and choose Enable.
You should also select the Set as default device option if you see it on the context menu. If it is already the default, you’ll see a green tick and the Default Device entry.
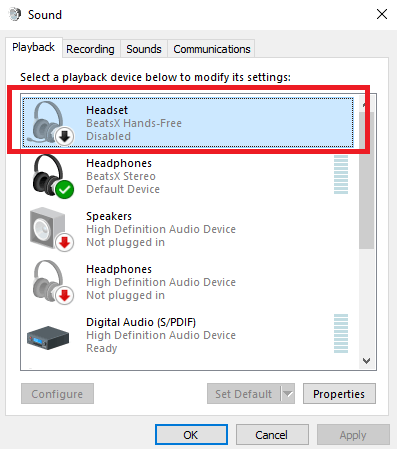
Note: If you use a Bluetooth headset with a built-in microphone but would like to use a standalone microphone instead, make sure hands-free mode is disabled. On the Playback and Recording tabs of the Sound window, right-click any hands-free Bluetooth devices and select the Disable option.
Test your microphone again. If it still doesn’t work, move on to the next section.
Check App Permissions
In Windows 10 and 11, you can deny or allow apps from having access to certain permissions, one of which is access to your microphone. To access app permissions, follow the steps below: If the app you’re using isn’t a Microsoft app, look for the Let desktop apps access your microphone option at the bottom of the list. You can’t enable desktop apps individually— it’s all or nothing.